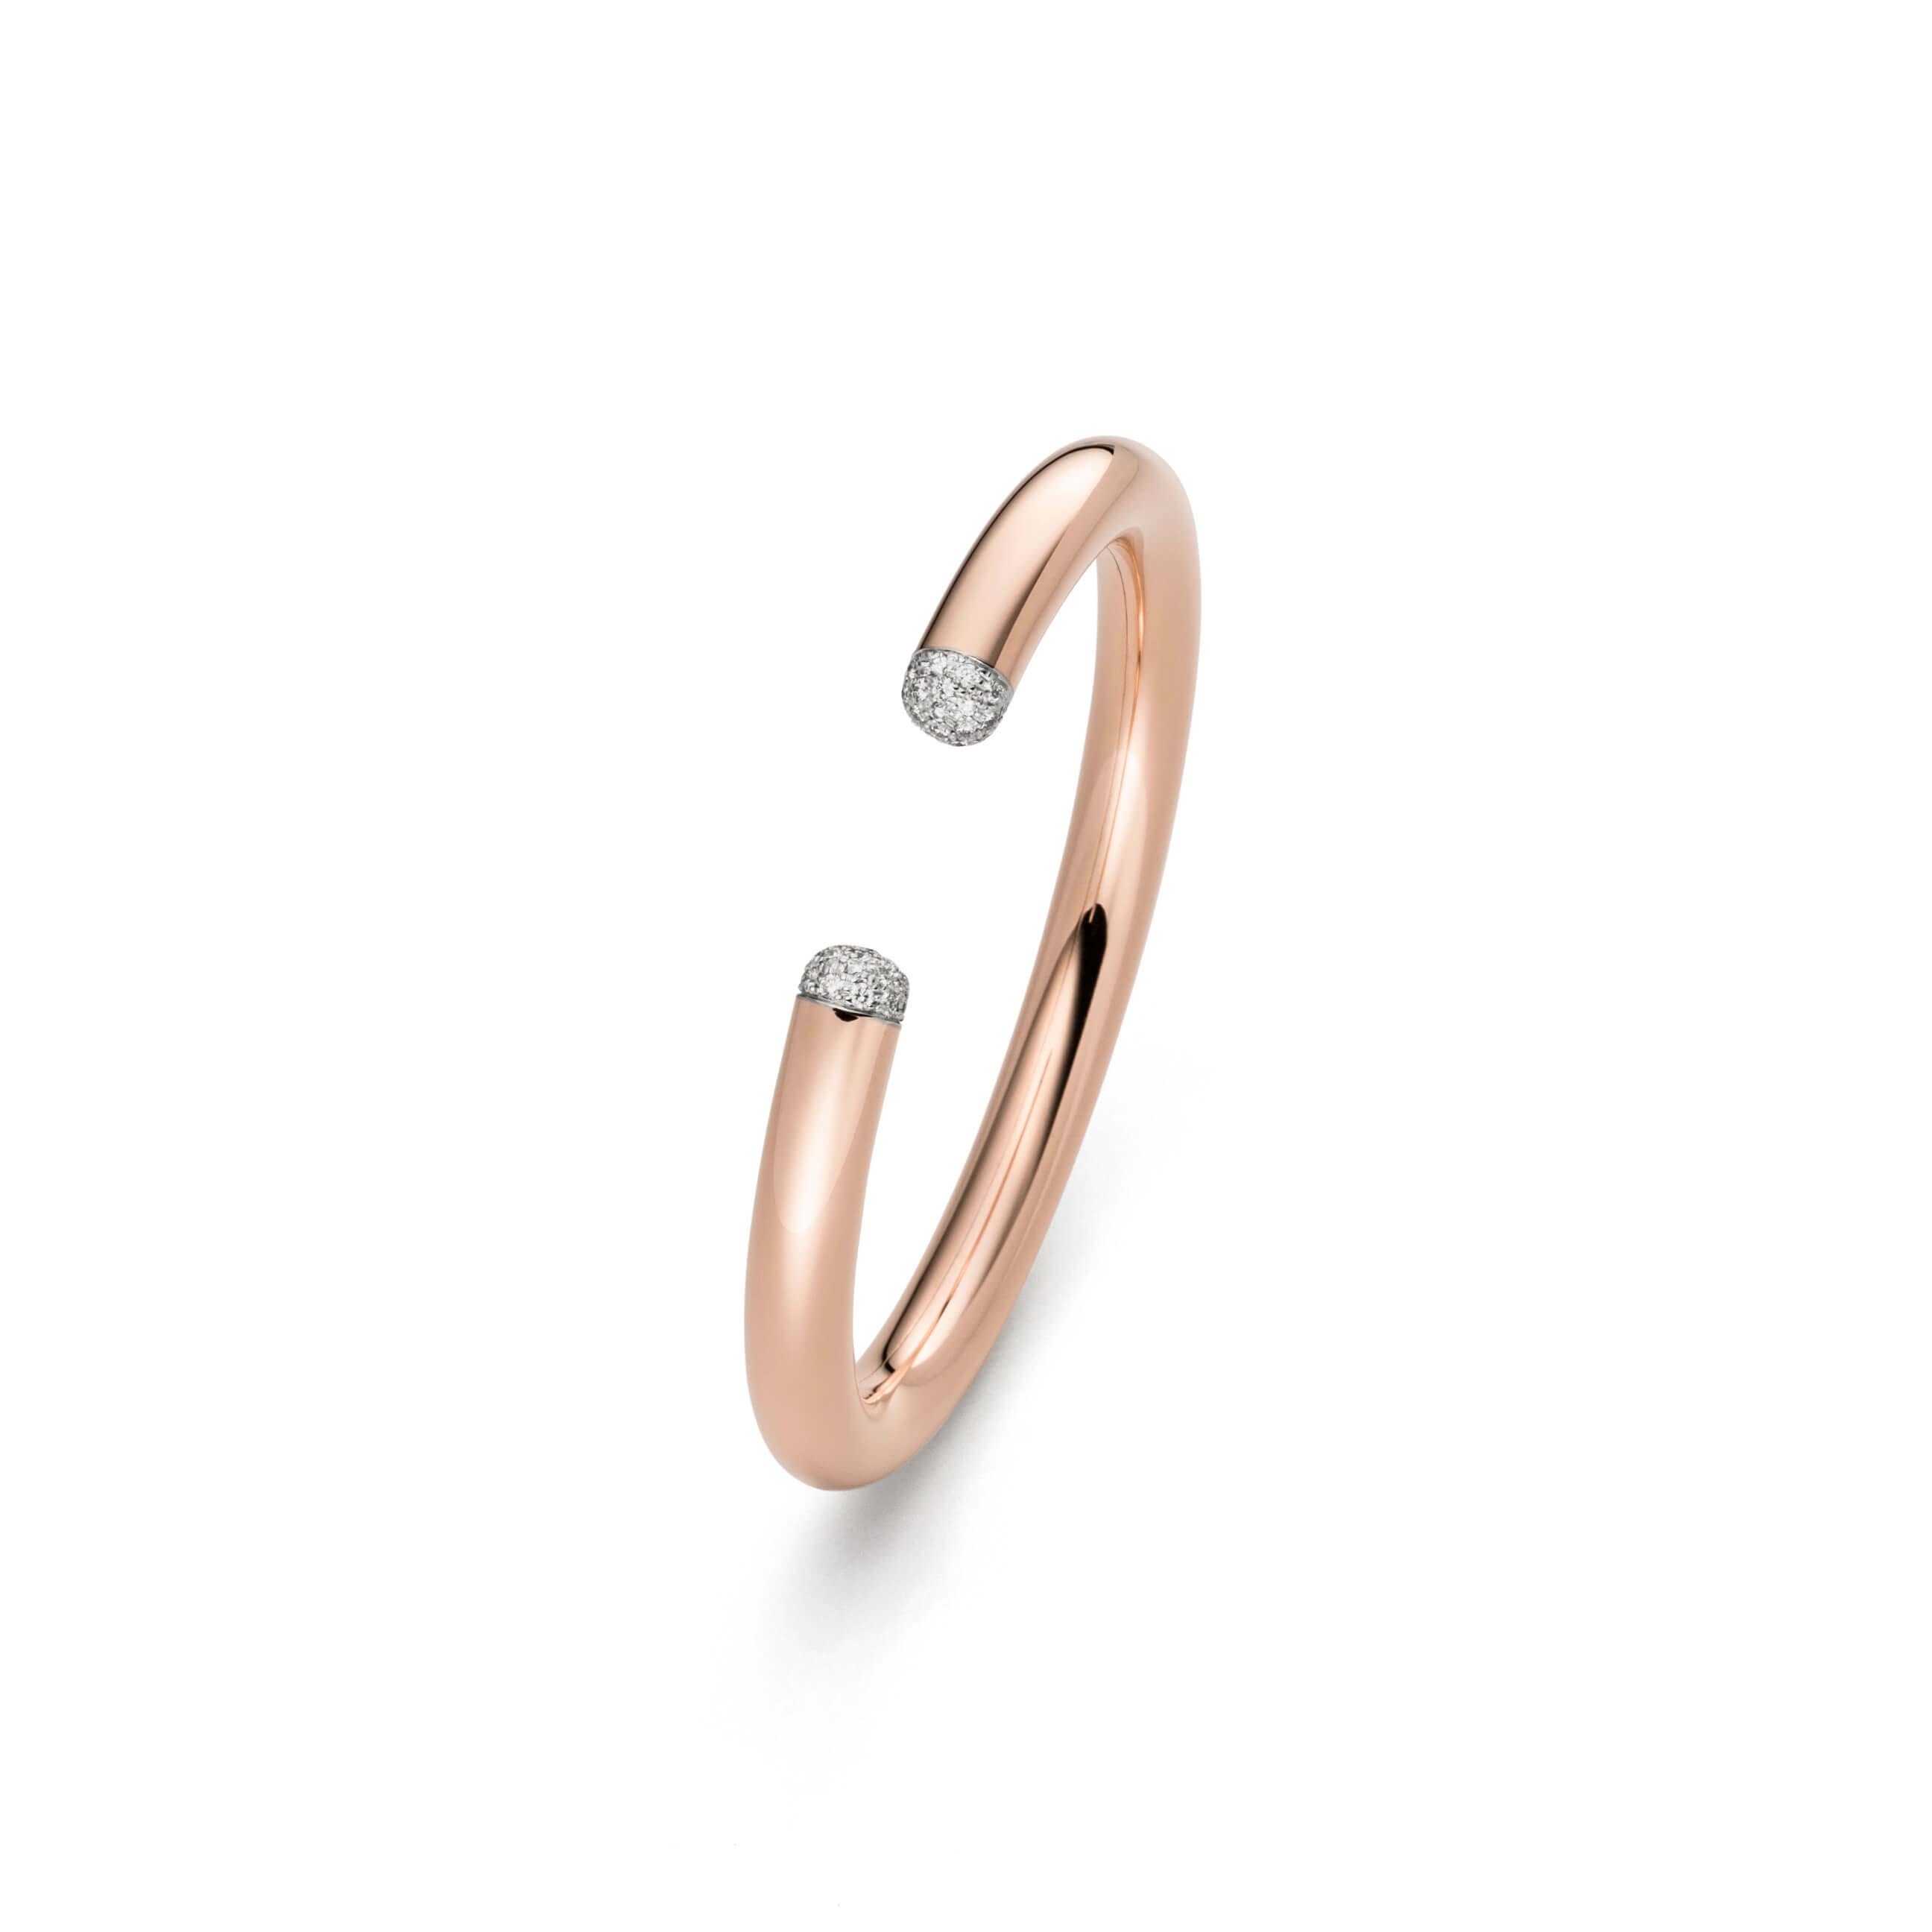
JINGYING : Custom Made Silver Jewelry Pave Tip Cuff Bracelet in Gold
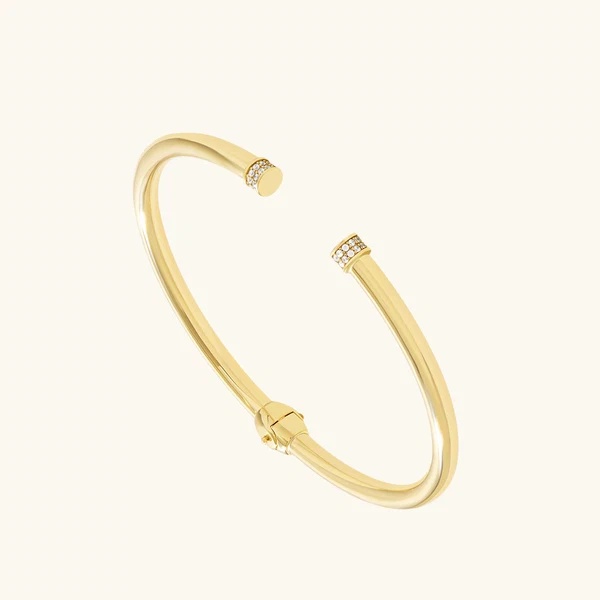

JINGYING : Custom Made Silver Jewelry Pave Tip Cuff Bracelet in Gold
LET’S GET STARTED : mo@kingjy.com
How to Custom Make a Silver Pavé Tip Cuff Bracelet in Gold
Introduction
The pavé tip cuff bracelet in gold—specifically, a sterling silver bracelet with a gold finish and pavé-set gemstone accents—represents one of the most sought-after combinations in contemporary jewelry design. The term “pavé” derives from the French word for “paved,” evoking the image of a cobblestone street where stones sit so closely together that little metal is visible between them. When executed on a cuff bracelet with a gold-plated silver base, the result is a piece that balances luxury with accessibility: the warmth and elegance of gold, the durability of sterling silver, and the dazzling sparkle of pavé-set stones.
This comprehensive guide walks through the entire custom manufacturing process—from initial design conception through the final gold plating—for creating a custom pavé tip cuff bracelet in gold. Whether you are a jewelry maker, a designer, or someone considering a custom commission, understanding each step will illuminate the craftsmanship behind these exquisite pieces.
Part One: Design and Planning
1.1 Conceptualization and Client Consultation
Every custom piece begins with an idea. The first step involves a thorough consultation where the designer and client discuss the vision for the bracelet. Key decisions include:
- Bracelet dimensions: width, thickness, and circumference
- Stone selection: diamonds, cubic zirconia, or colored gemstones
- Stone size and count: typically ranging from 1.0 mm to 2.5 mm for pavé work
- Gold finish type: standard gold plating or vermeil (a thicker gold layer over sterling silver)
- Design motifs: geometric patterns, organic flows, or custom engravings
During this phase, clients gather inspiration images and make decisions about metal choices, gemstone selections, and setting styles before any physical work begins.
1.2 Hand Sketching and Digital Modeling
The creative process typically begins with hand sketches that translate the client’s vision into a tangible design. Once the initial sketches are approved, the design moves into CAD (Computer-Aided Design) software such as Rhino or specialized jewelry CAD programs.
CAD modeling has revolutionized custom jewelry manufacturing, transforming it from a slow, interpretation-heavy process into a precise, repeatable workflow. Digital modeling offers several advantages:
- Precision: exact dimensions, stone placement, and metal thickness can be specified
- Revisions: changes can be made instantly without starting over from scratch
- Visualization: clients can see photorealistic renderings before production begins
- Feasibility testing: potential fabrication issues can be anticipated and solved in the digital model
For pavé setting in particular, CAD allows designers to map out stone layouts with mathematical precision, ensuring proper spacing and alignment before any metal is cut. Parametric tools like Grasshopper can generate complex, mathematically driven patterns that can be adjusted and refined with precision.
1.3 Material Selection: Sterling Silver
The base metal for this project is sterling silver (925), an alloy containing 92.5% pure silver and 7.5% other metals (typically copper). Sterling silver offers an ideal foundation because it is:
- Workable: soft enough for intricate setting work but durable enough for daily wear
- Affordable: significantly less expensive than solid gold
- Compatible with plating: accepts gold electroplating beautifully
When designing for pavé setting, the metal thickness must be carefully considered. For a cuff bracelet, the metal should be substantial enough to hold stones securely—typically 1.2 mm to 1.8 mm thick, depending on stone size and the number of rows.
Part Two: Creating the Cuff Bracelet Base
2.1 Preparing the Silver
The process begins with sterling silver sheet or wire stock. Using a ruler and permanent marker, the jeweler measures and marks the design on the silver sheet. For a cuff bracelet, the strip is typically cut to a length that will comfortably fit the wearer’s wrist, with extra allowance for shaping.
Using bench shears or a jeweler’s saw, the basic shape is carefully cut along the marked lines. A 2/0 saw blade is recommended for general cutting, with finer blades (4/0 or 6/0) used for intricate work. The saw blade should be lubricated with beeswax or a similar product for smooth cutting.
2.2 Filing and Smoothing
After sawing, the edges are filed smooth. Files are moved in one direction only—away from the jeweler—never back and forth. Coarser files (#0 or #1) remove more metal quickly, while finer files refine the surface. The goal is to achieve clean, smooth edges that will form the foundation of the bracelet’s profile.
2.3 Annealing and Shaping
Annealing is the process of heating the metal to soften it for easier manipulation. The silver is heated with a torch until it reaches a dull red glow, then quenched in water or pickle solution. This relieves internal stresses and makes the metal more pliable.
The bracelet is shaped on a bracelet mandrel—a stepped steel tool used to form the curve of the cuff. The jeweler begins by forming the two ends first, then progressively pushes the form down the mandrel until the desired curvature and size are achieved. Hammering techniques may be used to add texture or refine the shape.
2.4 Soldering and Assembly
If the design requires multiple components—such as decorative elements, clasps, or structural reinforcements—these are soldered in place. Soldering involves applying heat and solder (a lower-melting-point metal alloy) to join silver components. Basic soldering techniques are essential for assembling complex cuff designs.
Part Three: The Pavé Setting Process
3.1 Understanding Pavé Setting
Pavé setting is a stone-setting technique where small gemstones are set so closely together that the metal between them is barely visible. In fine pavé work, stones are laid out so they nearly touch, and the seats are drilled and cut to equal depths. The word “pavé” evokes the image of a road paved with bricks—except in jewelry, we use diamonds or other gemstones instead of bricks.
Good pavé relies greatly on the eye and skill of the setter, as there are no real shortcuts with this technique. It requires precision, patience, and a steady hand.
3.2 Layout and Marking
The first step in pavé setting is laying out the stone positions. On the flat surface of the cuff, the jeweler uses a ruler and dividers to mark the grid where stones will be placed. For a single row of stones, three parallel lines are typically laid out: a centerline followed by two lines spaced at approximately half the stone’s diameter.
Some setters use a different approach: smearing beeswax on the surface and placing stones upside down to visualize the layout. Stones are shifted around until the proper arrangement is achieved, with rows offset by about half a stone’s width for optimal coverage.
3.3 Drilling Pilot Holes
Once the layout is marked, pilot holes are drilled for each stone. A 1 mm drill bit is used initially to create pilot holes. The jeweler follows with incrementally larger bits—1.5 mm, then 2 mm—and finishes with a bit that creates holes approximately 75 percent of the stones’ diameter.
As each new size is used, the jeweler can correct the layout by pressing the drill in the desired direction to remove more metal and re-center the hole. This is the last opportunity to make adjustments before the setting begins.
3.4 Cutting the Seats
With pilot holes drilled, the jeweler uses a setting bur—typically 90 percent of the stone’s diameter—to create the seats where the stones will rest. The key is to have the ledge of the seat at the same depth on all seats, so all stones sit at the same height. The jeweler cuts and checks depths frequently to ensure consistency.
The final size of each seat should leave enough remaining metal above the girdles to be formed into beads that will secure the stones.
3.5 Creating the Beads
This is where pavé setting becomes an art form. Using an onglette or knife graver, the jeweler cuts into the remaining metal “walls” between the stones. The goal is to cut and gently push the metal toward the junctions where stones come together—a process called “raising a bead”.
The metal is firmly but gently cut and pushed so that it forms a solid clump at the junctions of the gemstones. This raised metal is then formed into a round ball using beading tools, first pushing toward the junction, then rounding it into a nice bead that captures the pavilions of the stones.
For shared bead pavé—where stones are so close that one bead captures two stones—the process is even more intricate. Outside rows may be held by three prongs while inside rows are held by two.
3.6 Setting the Stones
With the beads raised, the stones are placed into their seats. Using a graver, the jeweler tightens the stones by moving the prongs or beads over the stone girdles. The prong tips are then rounded off with a beading tool.
Throughout this process, the jeweler must ensure that:
- All stones sit at the same height
- The stones are secure but not damaged
- No flat metal is visible between the beads
- The overall effect is a seamless “paved” surface
3.7 Finishing the Pavé
After all stones are set, the jeweler cleans up any excess metal with a sharp, well-polished graver to achieve the perfect pavé effect. The surface is then polished, taking care not to damage the stones or the delicate beads.
Part Four: Gold Plating
4.1 Understanding Gold Plating on Silver
Gold plating involves applying a layer of gold over a core of sterling silver through electrolysis—a controlled process in which the gold is bonded to the silver in an even layer. The result is a surface with the same visual expression as solid gold but at a more accessible price point.
When the gold layer meets a minimum thickness (typically 2.5 to 3 microns) over sterling silver, the piece may be classified as vermeil. Vermeil offers greater durability and a longer lifespan compared to standard plating.
4.2 Preparation for Plating
Before plating can begin, the silver surface must be immaculately clean. The process typically involves:
- Inspection: examining the piece for any flaws
- Deep cleaning: removing all grease, oils, and oxidation
- Polishing: achieving a smooth, reflective surface
- Surface preparation: acid activation to prepare the metal for plating
Some jewelers apply a “bright nickel flash” plating first as a barrier layer to prevent diffusion of silver into the gold plating. This barrier also imparts additional shine.
4.3 The Electroplating Process
The actual plating takes place in a plating bath. The jewelry piece is submerged in a gold plating solution, and a precise electrical current is applied. The current causes gold ions in the solution to bond to the silver surface, creating an even layer of gold.
For high-quality results, some manufacturers perform two rounds of plating: first a thick silver plating to ensure a smooth base, then the actual gold plating. A thickness of up to 3 microns is recommended for durability—typically lasting about a year with normal wear.
4.4 Final Finishing
After plating, the piece is rinsed, dried, and inspected. A final polish may be applied to enhance the gold’s luster and remove any minor imperfections.
Part Five: Quality Control and Care
5.1 Quality Control
Every custom piece undergoes rigorous quality control before delivery. This includes:
- Stone security check: ensuring all stones are firmly set
- Plating inspection: verifying even coverage and proper thickness
- Fit testing: confirming the bracelet fits comfortably
- Overall aesthetics: checking for any visible flaws or inconsistencies
5.2 Care Instructions for Gold-Plated Silver Jewelry
Gold-plated silver requires more care than solid gold because the plating can wear over time. Proper care preserves both color and luster.
Daily care:
- Wipe jewelry with a soft, dry cloth after each wear to remove oils and sweat
- Avoid contact with water, especially salt water and chlorinated water
- Remove jewelry before showering, bathing, or swimming
- Remove jewelry at night to prevent unnecessary wear and scratches
Cleaning:
- Use a cleaning solution specifically intended for gold-plated jewelry
- For deeper cleaning, dissolve a small drop of mild dish soap in lukewarm water and soak briefly
- Never use abrasive polishes, silver cloths, toothpaste, or baking soda—these will scratch and strip the gold layer
Avoid:
- Contact with perfumes, lotions, and chemicals
- Aggressive rubbing or polishing
Conclusion
Creating a custom pavé tip cuff bracelet in gold is a journey that combines artistry, precision engineering, and traditional craftsmanship. From the initial client consultation through CAD modeling, silver fabrication, intricate stone setting, and final gold plating, each step requires skill, patience, and attention to detail.
The result is a piece of jewelry that offers the best of multiple worlds: the durability and affordability of sterling silver, the luxury and warmth of gold, and the dazzling brilliance of pavé-set stones. Whether created as a personal treasure, a gift, or a piece for a jewelry collection, the custom pavé tip cuff bracelet represents the pinnacle of what modern jewelry-making can achieve—a perfect marriage of technology and tradition, of precision and artistry.
As with any fine jewelry, proper care ensures that this heirloom-quality piece will be enjoyed for years to come, its gold finish gleaming and its stones sparkling as brilliantly as the day it was completed.