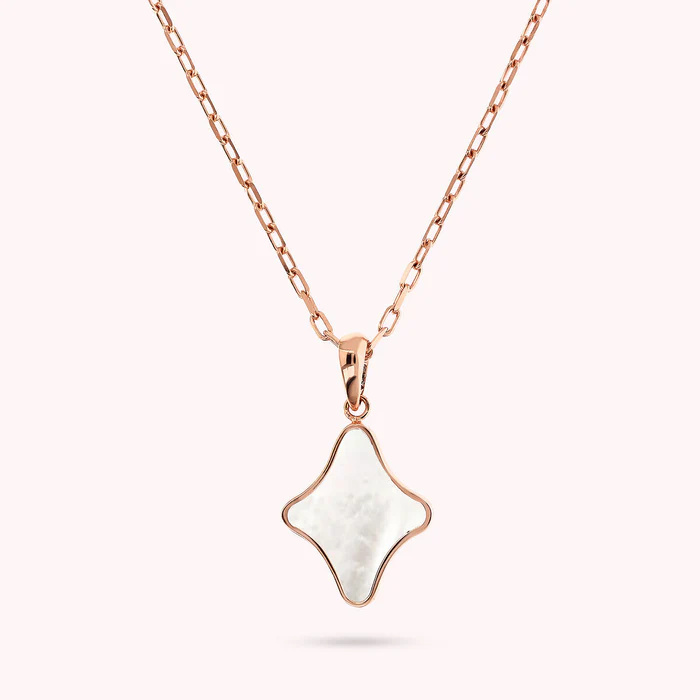
The Artisan’s Guide: Crafting a Mother-of-Pearl Shell Étoile Pendant Necklace
The allure of a handcrafted piece of jewelry is undeniable. It carries a story, a fragment of the maker’s time, passion, and skill. Among the most elegant and timeless creations is a chain necklace adorned with a delicate étoile (star) pendant, meticulously crafted from the iridescent canvas of a mother-of-pearl shell. This project is a beautiful synergy of organic beauty and precise craftsmanship, resulting in a piece that is both celestial and oceanic, a tiny universe captured in a wearable form.
This guide is designed to be your comprehensive companion through this journey. We will move from understanding our materials and gathering our tools, through each meticulous step of creation, to the final, satisfying moment of clasping the finished necklace. Whether you are a seasoned jeweler or an enthusiastic beginner, this tutorial will provide the depth and detail needed to succeed.
Part 1: The Foundation – Materials and Tools
The success of any project hinges on the quality and suitability of its components. Let’s delve into each element required.
1.1. The Centerpiece: Mother-of-Pearl Shell
Mother-of-pearl (or nacre) is not a specific type of shell but rather the iridescent lining of many mollusks, including abalone, pearl oysters, and freshwater mussels. This material is a natural composite of aragonite (calcium carbonate) tablets and conchiolin (a protein), which gives it its legendary strength and mesmerizing play-of-color.
- Choosing Your Shell:
- Abalone (Haliotis): Renowned for its intense, swirling colors of blues, greens, purples, and pinks. It is a popular choice for its dramatic effect but can be more challenging to cut due to its curve and thickness.
- White Pearl Oyster (Pinctada maxima): Offers a classic, elegant look with a soft, luminous white base and hints of pink, silver, and gold. It is often flatter and easier to work with for beginners.
- Freshwater Mussel: Can display a range of colors from white to deep purple. It is typically more affordable and available in pre-cut pieces or blanks.
- Sourcing: You can purchase whole shells from specialty suppliers, online craft stores, or even find them on beaches (though beach-found shells may be weathered and less iridescent). For this project, pre-cut mother-of-pe pearl blanks (often 25-30mm rounds or ovals) are highly recommended. They provide a flat, uniform, and manageable starting point, saving you from the most difficult step of cutting and grinding a whole shell.
1.2. The Structure: Chain and Findings
- Chain: The chain acts as both a functional and aesthetic frame for your pendant.
- Type: Choose a style that complements the delicate, organic nature of the pendant. Cable chain, rope chain, or a fine box chain are excellent choices. A Figaro chain can add a classic touch.
- Material: For durability and a hypoallergenic quality, sterling silver (925) is a perfect match for the cool tones of mother-of-pearl. Gold-filled or 14k gold offers a warmer, luxurious contrast. Surgical stainless steel is a durable and affordable alternative.
- Length: Standard necklace lengths are 16″ (choker), 18″ (princess), 20″ (matinee), or 24″ (opera). An 18-inch chain is a versatile and popular choice for pendants.
- Findings: These are the essential components to complete the piece.
- Jump Rings: Small metal rings used to connect components. You will need at least two, sized appropriately for your chain (e.g., 4-6mm diameter, 20-22 gauge thickness). Ensure they are soldered closed or use ones with a clean, tight closure.
- Bail: This is the connector between the pendant and the chain. For a glued pendant, a glue-on bail is necessary. These have a flat platform for adhesion. Alternatively, you can use a clip-on bail if you don’t want to permanently affix the pendant, though it’s less secure.
- Lobster Clasp: A secure and easy-to-use closure.
- Crimp Beads/Tubes (optional): If you are using a beading wire instead of a pre-made chain, you will need these to finish the ends.
1.3. The Adhesive: Choosing the Right Glue
This is critical. Not all adhesives are created equal, especially for jewelry that will endure wear, moisture, and temperature changes.
- Two-Part Epoxy: This is the gold standard for gluing findings to stone, glass, or shell. It creates an incredibly strong, durable, and waterproof bond. Look for a clear, jeweler’s-grade epoxy. It requires mixing two components (resin and hardener) and has a set working time (e.g., 5 minutes to position, 24 hours to fully cure).
- Super Glue (Cyanoacrylate): While fast-setting, it can become brittle over time and may fog or craze the surface of certain materials. It is not recommended for a primary, long-term bond on a piece like this, though it can be useful for temporary holds during the process.
- UV Resin: This is a good alternative. It remains liquid until cured under a UV lamp, allowing for ample positioning time. It cures to a hard, clear finish quickly but can be slightly less impact-resistant than a strong epoxy.
Recommendation: Use a high-quality, clear, two-part epoxy for the most secure and permanent bond.
1.4. The Toolkit: Precision and Safety
- Cutting & Drilling:
- Dremel Rotary Tool or Flex shaft: This is the workhorse of the project. It offers variable speed control, which is essential for working with fragile shell.
- Diamond Drill Bits: For drilling the pilot hole for the star shape and any bail holes. Diamond bits are necessary for cutting through hard shell material efficiently and without cracking it. A range of small sizes (0.8mm – 2mm) is useful.
- Diamond Cutting/SAW Blade (Mandrel Mounted): A small, thin diamond-coated cutting wheel for the Dremel. This is used for the precision cutting of the star shape.
- Safety Glasses and Dust Mask: NON-NEGOTIABLE. Mother-of-pearl dust is very fine and should not be inhaled. Eye protection is essential from flying fragments.
- Shaping & Finishing:
- Diamond Burrs/Routing Bits: For the Dremel. These are used for grinding, shaping, and smoothing the edges of the cut star.
- Sandpaper/Sanding Sponges: A range of grits from coarse (e.g., 220 grit) to very fine (e.g., 1200-2000 grit) for hand-sanding the edges to a smooth, polished finish.
- Polishing Compounds: Tripoli (for cutting) and Rouge (for polishing) can be used with a felt or muslin wheel on your Dremel to bring the mother-of-pearl to a high shine.
- General Jewelry Making Tools:
- Jeweler’s Saw & Blades (Optional): For highly experienced crafters who prefer to cut the initial shell blank by hand.
- Chain-Nose Pliers: For opening and closing jump rings.
- Flat-Nose Pliers: For gripping and bending.
- Ring Clamp or Bench Vise: To hold the workpiece securely while you drill and cut.
- Painter’s Tape or Masking Tape: For protecting the surface and creating a guide for your star shape.
- Fine-Tip Permanent Marker: For drawing your design.
- Toothpicks & Mixing Surface: For applying and mixing epoxy.
- Lint-Free Cloth: For cleaning and polishing.

Part 2: The Creative Process – A Step-by-Step Walkthrough
Step 1: Design and Preparation
- Create Your Étoile Template: The first step is to define your star. You can find countless simple star silhouettes online. Print or draw one, keeping it proportional to your shell blank. A 15-20mm wide star is a good size for a pendant. Cut it out neatly to create a stencil.
- Prepare the Shell Blank: If you are using a pre-cut blank, ensure its surface is clean and dry. Wipe it with a damp cloth and let it air dry completely. If you are starting from a whole shell, this is a complex process involving securing the shell, cutting a rough piece with a saw, and then grinding it flat on a lapidary wheel or with coarse sandpaper—a project in itself.
- Apply the Template: Place your paper star stencil in the center of the shell blank, on the most attractive, colorful area. Use a small piece of painter’s tape to hold it in place. Trace around it very lightly with a fine-tip permanent marker. Remove the stencil. You should now have a faint star outline on the shell.
Step 2: The Delicate Art of Drilling and Cutting
SAFETY FIRST: Put on your safety glasses and dust mask. Work in a well-ventilated area.
- Secure the Workpiece: Place your shell blank securely in a ring clamp or a bench vise lined with soft jaws (leather or wood) to prevent crushing. It must not move during drilling or cutting.
- Drill the Pilot Holes: This is a crucial trick for intricate cutting. Using your Dremel with a small (e.g., 1mm) diamond drill bit, drill a hole inside each of the points (the “inlets”) of your star shape. The goal is to create a entry point for your cutting blade, allowing you to make sharp interior angles without cracking the shell.
- Cutting the Star Shape:
- Install the thin diamond cutting wheel in your Dremel.
- Set the Dremel to a medium speed. High speed can generate too much heat and pressure, risking cracks.
- Gently guide the cutting wheel from one pilot hole to the next, following your traced line. Do not force it; let the tool do the work. Apply light, steady pressure.
- Work your way around the entire star. The center piece should fall out once the final cut is complete, leaving you with a star-shaped “cookie cutter” hole in your shell blank.
- Refining the Shape: You will likely have a slightly rough star shape. Use a small, cylindrical diamond burr in your Dremel to carefully grind right up to the marked line, smoothing out any wobbles or imperfections in the cut. Take your time here—precision is key.
Step 3: Shaping, Smoothing, and Polishing
The goal is to transform the sharp, jagged edges into a smooth, bevelled, and comfortable finish.
- Initial Grinding: Use a diamond hand file or a coarse-grit diamond burr (e.g., 180 grit) in your Dremel to bevel the edges of the star, both on the front and back. This removes the sharpness and begins to create a polished look.
- Hand Sanding: This is where the magic happens. Progress through your sandpapers methodically:
- Start with 400-grit sandpaper, wetting it slightly. Sand the edges of the star with gentle, consistent strokes. Focus on removing all tool marks from the previous step.
- Rinse the shell and move to 600-grit sandpaper. Continue sanding; you will see the finish become smoother.
- Repeat the process with 800, 1000, and finally 1500 or 2000-grit sandpaper. With each step, the edges will become smoother and begin to take on a soft, satiny luster.
- Polishing (Optional but Recommended): For a professional, glossy shine, apply a small amount of polishing compound (like Zam) to a felt wheel attached to your Dremel. Run the Dremel at a low to medium speed and gently buff the edges of the star. Be careful not to catch the edge and snap the pendant. You can also achieve a beautiful shine by hand with the ultra-fine 2000+ grit sandpaper and a little water.
Step 4: The Final Assembly
- Test Fit and Clean: Do a dry run of your assembly. Attach the bail to the pendant with tape to see how it sits. Once satisfied, clean the back of the pendant and the glueing platform of the bail with isopropyl alcohol to remove any oils, dust, or fingerprints. This ensures a strong bond.
- Mix and Apply Epoxy: Follow the instructions on your two-part epoxy. Mix a very small amount on a disposable surface. Using a toothpick, apply a tiny, even layer to the platform of the bail.
- Position the Bail: Carefully place the bail onto the back of the pendant, at the top center. Press down firmly to ensure full contact and to squeeze out any tiny bubbles or excess epoxy.
- Clean Up and Cure: Immediately use a toothpick or a cotton swab dipped in alcohol to carefully wipe away any epoxy that has seeped out. A clean application is professional. Set the pendant aside in a safe, undisturbed place for the full curing time recommended by the epoxy manufacturer (usually 24 hours). Do not touch or move it during this time.
Step 5: Attaching the Chain
- Open a Jump Ring: This is a common point of failure if done incorrectly. Do not simply pull the ends apart sideways, as this will distort and weaken the ring.
- Use two pairs of pliers (chain-nose are best). Grip the jump ring on either side of the opening.
- Apply gentle pressure, pushing one pair of pliers towards you and the other away from you. This opens the ring by twisting it apart, maintaining its round shape.
- Connect the Components: Slide the opened jump ring through the loop on the bail. Then, slide it through the last link of your chain. If you are using a clasp, you will attach it in the same way on the other end.
- Close the Jump Ring: Reverse the motion you used to open it. Bring the ends back together with a slight twisting motion, ensuring there is no gap. The closure should be seamless.
Part 3: Advanced Techniques and Design Variations
Once you’ve mastered the basic technique, a world of creativity opens up.
- Inlay and Embellishment: Instead of a cut-out, consider creating a star inlay. This involves cutting the star from a different material (e.g., turquoise, coral, or a contrasting color of mother-of-pearl) and carefully setting it into a recess carved into your main shell blank.
- Mixed Media: Incorporate tiny seed beads (e.g., using beading wire to create a bezel), wire-wrapping techniques around the edges of the star, or even a small freshwater pearl set in the center of the star.
- The “Floating” Pendant: Create a much smaller, more delicate star and drill a tiny hole through one of its points. Thread it directly onto a fine chain or use a very small jump ring, making it appear to float.
- The Double-Sided Pendant: Create two identical star pendants and glue them back-to-back (with the bail sandwiched between them) for a reversible pendant that shows iridescence from every angle.
- Oxidization: If using sterling silver, you can oxidize (antique) the chain and findings to create an aged, vintage look that makes the white of the mother-of-pearl pop dramatically.
Part 4: Troubleshooting and Care
- Problem: The shell cracked during drilling/cutting.
- Cause: Too much pressure, too high a speed, or a lack of pilot holes for interior angles.
- Solution: Start over, unfortunately. Remember: slow speed, light pressure, and always drill pilot holes.
- Problem: The edges are chipped or rough.
- Cause: Skipping grits in the sanding process or using a burr that is too aggressive.
- Solution: Go back to a coarser grit to remove the chip, then work your way back up through the grits patiently.
- Problem: The bail fell off.
- Cause: Surface not cleaned properly, not enough epoxy, or the wrong type of glue was used.
- Solution: Scrape off the old glue, thoroughly clean both surfaces with alcohol, and re-attach using a high-quality two-part epoxy.
- Caring for Your Finished Necklace:
- Mother-of-pearl is organic and relatively soft. Store it separately to avoid being scratched by harder jewelry.
- Avoid exposing it to chemicals, perfumes, hairsprays, and household cleaners.
- Clean it gently with a soft, damp cloth and dry immediately. Do not soak it.
- Put your necklace on last when getting ready and take it off first.
Conclusion: A Constellation of Your Own Making
The process of transforming a raw piece of nature into a refined piece of jewelry is deeply rewarding. You have not merely assembled a necklace; you have engaged in a dialogue with the material. You’ve learned its strengths and fragilities, you’ve revealed the hidden star within the shell’s glow, and you’ve given it a new life.
The mother-of-pearl étoile pendant necklace you create will be unique. Its specific play-of-color, the subtle nuances of its shape, and the love imbued in its making cannot be replicated. It is a personal talisman, a testament to patience and creativity—a small, shining star that you can wear, a constant reminder that you have the power to create beauty with your own hands.
Wear it in good health and with immense pride.