Introduction
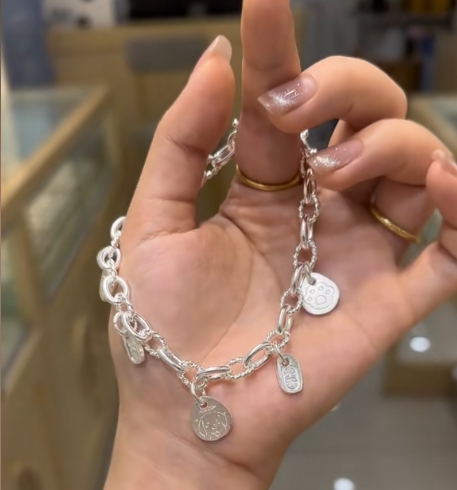
Creating your own sterling silver bracelet is a rewarding and creative process that allows you to craft a unique piece of jewelry. Whether you’re a beginner or an experienced jewelry maker, this guide will walk you through the essential steps, tools, and techniques needed to make a beautiful, high-quality sterling silver bracelet.
Sterling silver is an alloy consisting of 92.5% silver and 7.5% other metals (usually copper) for added strength. It is a popular choice for jewelry due to its durability, shine, and affordability compared to pure silver.
This guide covers:
- Materials and Tools Needed
- Designing Your Bracelet
- Cutting and Shaping the Silver
- Soldering (If Required)
- Filing and Sanding
- Polishing and Finishing
- Adding Clasps and Embellishments
- Caring for Your Sterling Silver Bracelet
By the end, you’ll have the knowledge to create a professional-looking sterling silver bracelet.
1. Materials and Tools Needed
Before starting, gather the necessary materials and tools:
Materials:
- Sterling silver wire or sheet (depending on design)
- Jump rings (for attaching clasps)
- Clasp (lobster, toggle, or magnetic)
- Solder (if joining pieces)
- Flux (for soldering)
- Polishing compounds (rouge or tripoli)
- Patina solution (optional, for antique effects)
Tools:
- Jewelry saw & blades (for cutting silver)
- Metal files (flat, round, and half-round)
- Sandpaper (various grits: 220 to 2000)
- Bench pin & vise (for stability)
- Soldering torch (butane or propane)
- Third hand or tweezers (for holding pieces)
- Steel block & rawhide mallet (for shaping)
- Polishing wheel or rotary tool
- Ruler & calipers (for measurements)
- Pliers (round-nose, flat-nose, chain-nose)
Having the right tools ensures precision and efficiency in your work.
2. Designing Your Bracelet
Before cutting metal, plan your design:
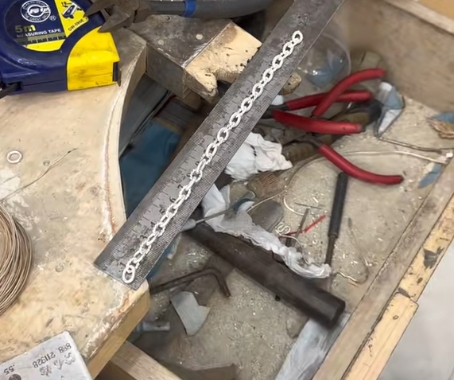
Bracelet Styles:
- Chain bracelet (made with links)
- Cuff bracelet (solid or open-ended)
- Bangle (rigid, circular)
- Beaded bracelet (silver with gemstones)
Measurement Tips:
- Use a flexible measuring tape to determine wrist size.
- Add ½ inch for comfort (or more for a looser fit).
- Standard bracelet lengths:
- Women: 7–7.5 inches
- Men: 8–8.5 inches
Sketch your design and mark dimensions before proceeding.
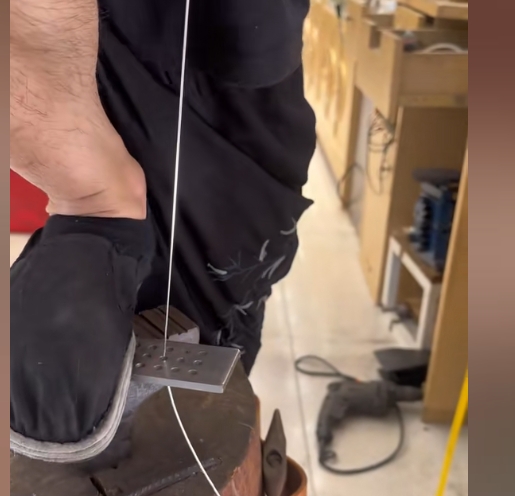
3. Cutting and Shaping the Silver
A. Cutting the Silver
- For wire-based bracelets:
- Measure and mark the desired length.
- Use flush cutters for a clean cut.
- For sheet metal (cuffs or bangles):
- Transfer the design onto the silver sheet.
- Secure the sheet on a bench pin.
- Use a jeweler’s saw with a fine blade (size 2/0 or 3/0) to cut along the lines.
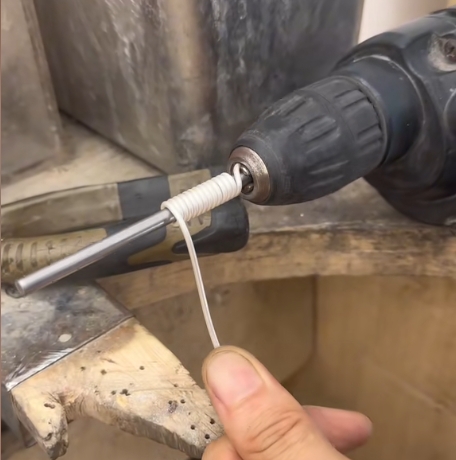
B. Shaping the Silver
- For wire: Bend using round-nose pliers or a mandrel.
- For cuffs/bangles:
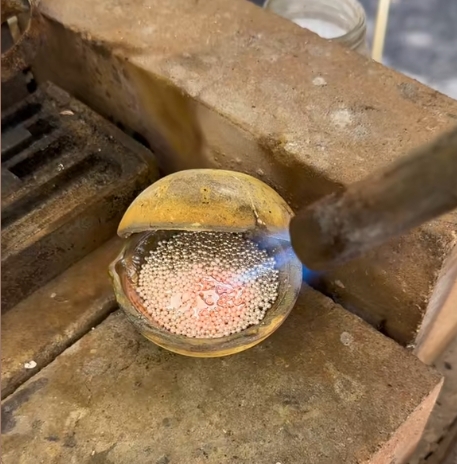
- Anneal (soften) the silver by heating it with a torch until glowing red, then quench in water.
- Hammer gently on a steel block or mandrel to shape.
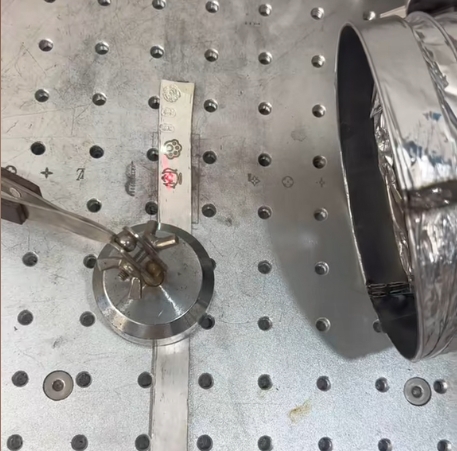
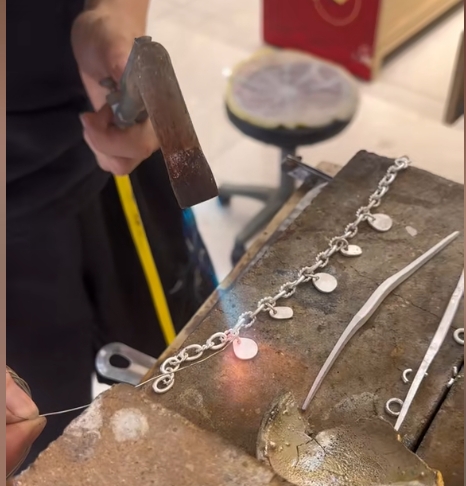
4. Soldering (If Required)
Soldering joins metal pieces together.
Steps:
- Clean the surfaces with sandpaper.
- Apply flux to prevent oxidation.
- Place small solder pieces on the joint.
- Heat evenly with a torch until the solder flows.
- Quench in water and pickle (clean with a mild acid solution).
5. Filing and Sanding
Smooth rough edges for a professional finish:
- Filing: Use a flat file for straight edges and a half-round file for curves.
- Sanding: Start with 220-grit sandpaper and progress to 2000-grit for a mirror finish.
6. Polishing and Finishing
- Polishing: Use a rotary tool with a polishing wheel and jeweler’s rouge.
- Optional Patina: Apply liver of sulfur for an antique look, then polish highlights.
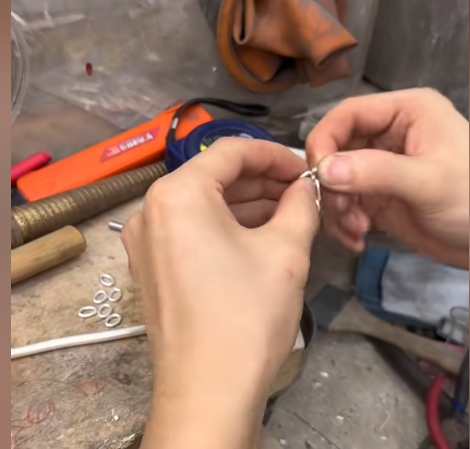
7. Adding Clasps and Embellishments
- Attach jump rings using pliers.
- Secure the clasp by opening/closing jump rings properly.
- Add charms or gemstones (if desired).

8. Caring for Your Sterling Silver Bracelet
- Store in an anti-tarnish bag.
- Clean with a silver polishing cloth.
- Avoid exposure to chemicals (perfume, chlorine).
Conclusion
Making a sterling silver bracelet requires patience and precision, but the result is a stunning, handcrafted piece. With practice, you can experiment with different designs and techniques to create unique jewelry.
Now that you have the knowledge, gather your tools and start crafting!