Forging Faith and Form: A Comprehensive Guide to Creating a Sterling Silver Cross Pendant
The cross is one of the most ancient and powerful symbols in human history. Representing faith, sacrifice, hope, and identity, it transcends mere ornamentation to become a deeply personal talisman. To create a cross pendant from sterling silver with your own hands is to participate in a timeless tradition of craftsmanship, transforming a raw, precious metal into an object of meaning and beauty. This process is a fulfilling journey that blends artistic vision with meticulous technique.
This guide will provide a exhaustive, step-by-step walkthrough of the entire process, from the initial spark of an idea to the final, polished pendant ready to be worn. We will explore multiple fabrication methods, from ancient hand-forging techniques to modern digital design, ensuring you understand the tools, materials, and skills required to bring your unique cross to life.
Phase 1: The Foundation – Design and Inspiration
Before you touch a single tool or piece of silver, you must have a clear vision. The design phase is arguably the most critical, as it dictates every step that follows.
Step 1: Sourcing Inspiration and Defining Your Style
A cross pendant can take innumerable forms. Begin by exploring different styles to find one that resonates with you:
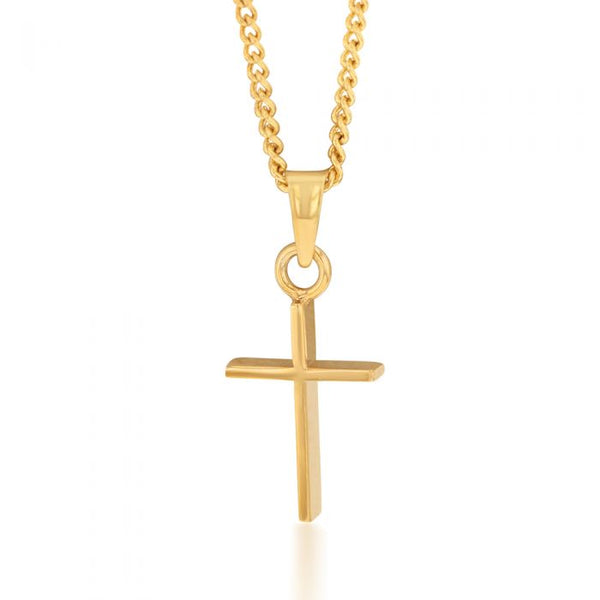
- The Latin Cross: The most common form, featuring a long vertical bar intersected by a shorter horizontal bar.
- The Celtic Cross: Characterized by a circle surrounding the intersection of the arms, often adorned with intricate knotwork.
- The Greek Cross: Features four arms of equal length.
- The Crucifix: Depicts the body of Christ (corpus) on the cross, requiring more advanced sculpting skills.
- The Eastern Cross: Common in Orthodox traditions, with three horizontal crossbars.
- Modern/Abstract Cross: Focuses on minimalism, geometric shapes, and negative space.
Gather images, sketches, and historical references. Create a mood board to solidify the aesthetic you want to achieve—whether it’s ornate and traditional or sleek and contemporary.
Step 2: Technical Sketching and Dimensioning
Translate your inspiration into a technical drawing.
- Start with Thumbnail Sketches: Draw small, quick versions of your cross to experiment with proportions.
- Create a Final Scale Drawing: Draw the cross to its exact intended size. This will be your blueprint.
- Specify Dimensions: Note the exact length, width, and thickness. Decide on the cross-section of the arms: will they be flat, rounded (domed), square, or perhaps even twisted?
- Consider 3D Form: A pendant isn’t flat. Sketch a side-view profile. Will it be a flat sheet metal cross, or will it have volume? Will the surface be textured, polished, or a combination of both?
- Plan for the Bail: The bail is the loop from which the chain hangs. Will it be integrated into the design (e.g., a loop formed from the top of the vertical bar) or soldered on separately?
Step 3: Material and Tool Preparation
Based on your design, gather your materials.
- Metal: You have chosen 925 Sterling Silver. This is an alloy of 92.5% pure silver and 7.5% other metals, usually copper, which adds strength and durability. It comes in various forms:
- Sheet: For pendants cut from a flat plane. The thickness is measured in gauge (e.g., 18-gauge is about 1mm thick, a good starting point for a sturdy pendant).
- Wire: For creating wire-based crosses, frames, or bails. Round, half-round, and square wire are common choices.
- Pre-made Casting Grain: For the lost-wax casting method.
- Tools: The basic toolkit will include:
- Saw Frame & Blades (size 2/0 or 3/0 for intricate work)
- Files (flat, half-round, round, and needle files)
- Sandpaper & Emery Sticks (multiple grits from 220 to 1200)
- Bench Pin & Vise
- Soldering Setup: Torch (butane or oxy-acetylene), solder (hard, medium, easy), flux, pick, and tweezers.
- Polishing Setup: Polishing motor, muslin wheels, tripoli compound, rouge compound.
- Safety Equipment: Safety glasses, respirator for polishing, fireproof surface.
Phase 2: The Fabrication – Bringing the Design to Life
There are three primary ways to create a silver cross pendant: fabrication from sheet/wire, carving and casting, and folding forming. We will focus on the first two, which are most common for pendant work.
Method A: Fabrication from Sheet Silver (Sawing and Soldering)
This is the most direct method and offers excellent control over the final result.
Step 4: Transferring the Design and Sawing
- Anneal the Silver: Heat your piece of sheet silver evenly with your torch until it glows a dull red. Quench it in water. This process softens the metal (makes it “dead soft”), making it much easier to saw and shape.
- Transfer the Design: Coat the silver with a light layer of layout fluid (or a permanent marker). Once dry, tape your paper design onto the metal and use a scribe to prick through the paper along the outline, transferring the design onto the silver as a series of dots. Connect the dots with your scribe.
- Sawing: Secure your bench pin to your workbench. Thread a saw blade through a starter hole drilled in the waste silver (or just inside the outline). Attach the blade to your saw frame, ensuring the teeth point downwards and towards you. Using a steady, up-and-down motion with minimal pressure, carefully follow the outline of your cross. Let the tool do the work.
Step 5: Filing and Refining the Shape
Once the cross is cut out, the edges will be rough.
- Use a flat file to true up the edges and bring the shape to your final scribed line.
- Use needle files to refine the corners and any intricate areas.
- Bevel the Edges: For a comfortable and professional feel, use a file to gently bevel (round over) all the sharp edges. This creates a pleasing, light-catching facet.
Step 6: Adding Surface Detail and Texture (Optional)
This is where you personalize the cross.
- Engraving: Using a graver, you can hand-engrave patterns, names, or dates.
- Stamping: Use metal stamps to imprint textures or patterns.
- Hammer Texturing: Use a ball-peen or texturing hammer to create a dimpled or patterned surface.
- Oxidization Planning: You can plan to later oxidize (darken) these recessed areas to make the texture stand out.
Step 7: Creating and Attaching the Bail
The bail must be strong, as it bears the weight of the pendant.
- Fabricate the Bail: Cut a short length of square or round wire. Using round-nose pliers, bend it into a “U” or tear-drop shape. Ensure the inner diameter is large enough for your intended chain.
- Prepare for Soldering: Sand the contact points on the bail and the top of the cross with fine sandpaper to ensure they are clean and flat.
- Soldering: This is a precise skill. Place the cross on a soldering block. Apply a small amount of flux to the joint. Place a tiny pallion (piece) of easy solder next to the joint. Using a controlled, soft flame, heat the entire cross evenly. The goal is to bring the entire piece up to soldering temperature so that when the flame touches near the solder, it flows smoothly into the joint. The solder will be drawn towards the heat. Quench and pickle the piece to clean off fire scale and flux residue.
Method B: The Lost-Wax Casting Method
This method is ideal for highly complex, sculptural, or 3D crosses that would be difficult to saw and solder.
Step 4b: Carving the Wax Model
- Select a Wax: You can use a jeweler’s wax block or a pre-formed wax tube for the cross shape.
- Carving: Using wax files, saws, and burrs in a flexible-shaft machine (like a Foredom), carve your cross design into the wax. This process is subtractive—you remove material to reveal the form.
- Refining: Refine the shape with smaller tools, adding details like texture, patterns, or even a carved corpus. The wax model is exactly what your final silver piece will look like.
Step 5b: Spruing, Investing, and Burnout
- Spruing: Attach your wax model to a wax “tree” with several sprues (wax rods). These act as channels for the molten metal.
- Investing: Place the tree inside a steel flask. Mix a heat-resistant investment plaster, pour it into the flask, and let it harden.
- Burnout: Place the flask in a kiln. The heat will melt out all the wax (hence “lost-wax”), leaving a perfect negative cavity of your cross inside the hardened plaster.
Step 6b: Casting
- Melt the Silver: Place the required amount of sterling silver casting grain in a crucible.
- Centrifugal Casting: Use a centrifugal casting machine. As the silver melts, the machine is spun, using centrifugal force to fling the molten metal into the empty plaster mold, filling every detail.
Step 7b: Devesting and Cleaning the Casting
Once cooled, the plaster mold is broken away (devested) in water. The raw silver cross, now with attached sprues, is revealed. Cut off the sprues and begin the cleaning process.
Phase 3: The Revelation – Finishing and Polishing
Whether sawn or cast, the cross is now a raw, unfinished silver object. This phase transforms it into a piece of fine jewelry.
Step 8: Initial Cleaning and Surface Preparation
- For a fabricated piece, this means removing any remaining saw marks and solder seams with files and sandpaper.
- For a cast piece, this is more intensive. You must use a saw, files, and eventually a pendant motor with silicone burs to meticulously remove all the sprue stubs and smooth the surface. This process is called “fettling.”
Step 9: Sanding and Smoothing
This is a patient, multi-step process crucial for a professional finish.
- Start with a coarse grit sandpaper (e.g., 220) to remove file marks and major imperfections.
- Progress through sequentially finer grits: 400, 600, 800, and finally 1200. With each step, you remove the scratches from the previous, finer grit.
- Sand in different directions to ensure you’ve eliminated all deep scratches. The piece should have a uniform, satin-matte finish before polishing.
Step 10: Oxidization (Optional – Antiquing)
If you want to highlight textures or engraved lines:
- Apply Liver of Sulfur: Heat the cross in warm water. Dip it into a diluted liver of sulfur solution. It will rapidly turn black.
- Polish Selectively: Using a polishing pad or a buff stuck in a pendant motor, polish the high points of the cross. The black oxidization will remain in the recesses and textures, creating dramatic contrast and depth. This is especially effective on Celtic knotwork or engraved designs.
Step 11: Final Polishing
This brings out the brilliant, mirror-like shine of sterling silver.
- Polishing Wheel: Use a polishing motor with a stitched muslin wheel charged with Tripoli compound. This is an abrasive compound that removes the final layer of fine scratches. Hold the cross firmly and pass it across the bottom of the wheel. Caution: Do not let it catch and fly out of your hand.
- High-Shine Polishing: Switch to a clean, loose muslin wheel charged with red Rouge compound. This is a very fine polishing agent that brings up the final high shine. Buff the entire piece until it gleams.
Step 12: Final Assembly and Quality Check
- Ensure the bail is secure and the opening is smooth.
- Give the entire piece a final inspection under magnification for any missed scratches or polishing compound residue.
- Clean it thoroughly in an ultrasonic cleaner or with warm soapy water and a soft toothbrush to remove all polishing compounds.
- Rinse and dry with a soft, lint-free cloth.
Conclusion: A Symbol Forged in Silver
Creating a sterling silver cross pendant is a deeply rewarding endeavor that merges creative passion with disciplined craftsmanship. It is a journey of transformation—not just of metal into a symbol, but of an idea into a tangible reality. Each stroke of the file, each precise application of the torch, and each pass on the polishing wheel imbues the object with a part of yourself.

The finished pendant is more than an accessory; it is a testament to patience, skill, and personal expression. Whether you choose the hands-on control of fabrication or the sculptural freedom of casting, the result is a unique, handcrafted heirloom. A piece that carries not only its ancient symbolic weight but also the modern story of its creation—a story you told with silver, fire, and your own two hands. Wear it with pride, for you have not merely purchased a piece of jewelry; you have forged a personal icon.