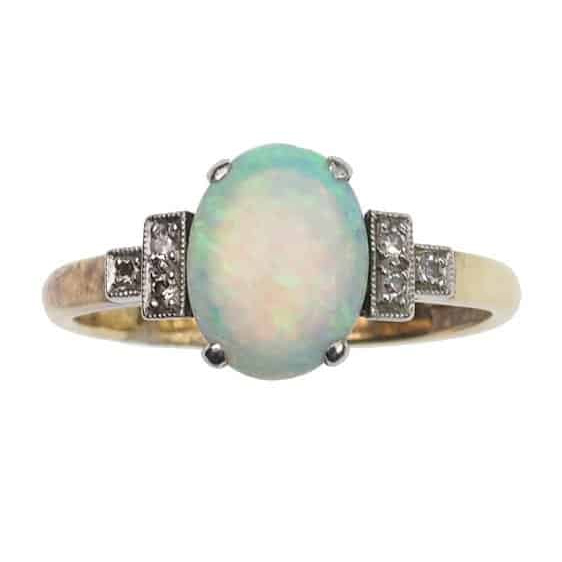
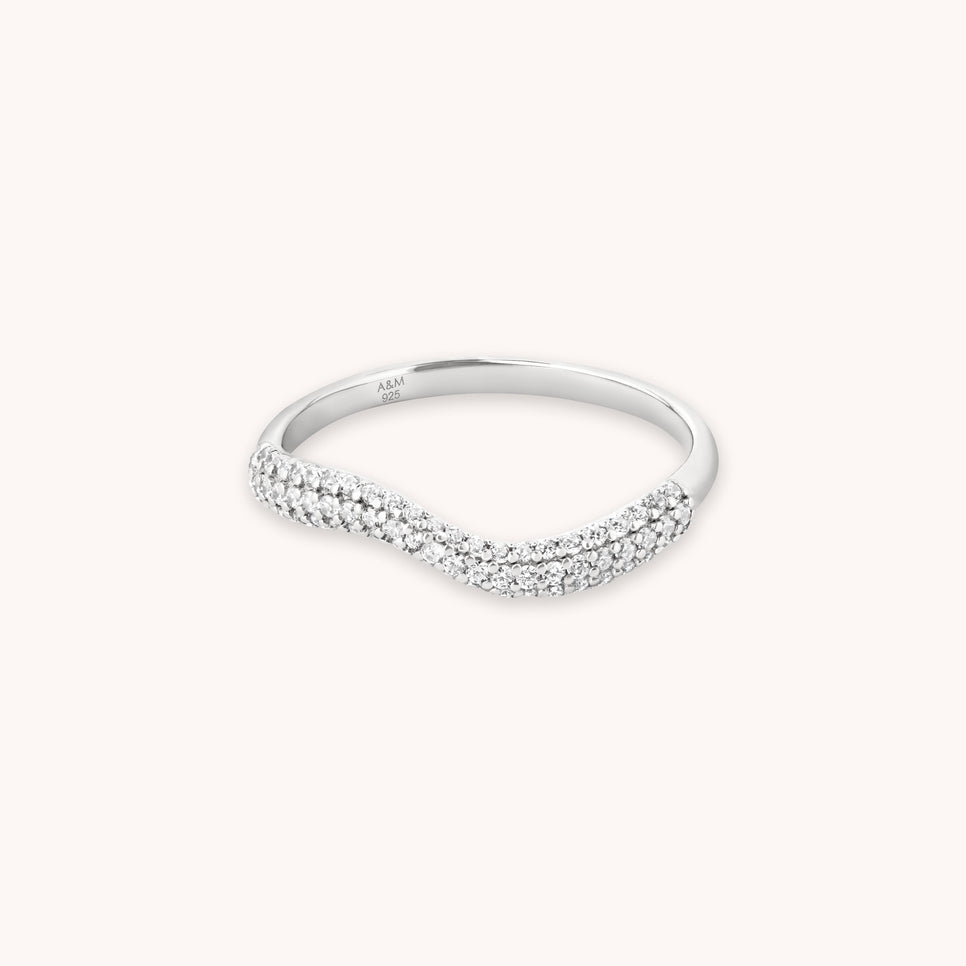
JINGYING manufacture high quality, gold dipped silver jewelry Inner Light Ring


JINGYING manufacture high quality, gold dipped silver jewelry Inner Light Ring
LET’S GET STARTED : mo@kingjy.com
The Art of Luminescence: A Technical Guide to Manufacturing High-Quality, Gold-Dipped Silver “Inner Light” Rings
Abstract
The “Inner Light” ring represents a significant category in contemporary jewelry design, combining the affordability and durability of sterling silver with the luxury appearance of gold. This comprehensive guide details the complete manufacturing process for high-quality gold-dipped silver rings, from initial design through final quality assurance. The process encompasses five major phases: design conceptualization, master model creation, mold fabrication, silver casting and finishing, and finally, gold electroplating. Special attention is given to achieving an optimal 2.5-3.5 micron gold layer—thick enough to withstand daily wear yet economically viable. Drawing on established metallurgical principles and electroplating research, this guide provides actionable protocols for producing jewelry that meets professional standards for durability, appearance, and regulatory compliance.
1. Introduction
1.1 Defining the “Inner Light” Ring Category
The term “Inner Light” in jewelry describes pieces characterized by their radiant, luminous quality—pieces designed to “capture a halo of radiance” and reflect the wearer’s inner positivity . Contemporary collections feature “Inner Light” rings in both sterling silver and gold vermeil variants, often incorporating positive mantras or minimalist double-band silhouettes designed for everyday wear and stacking .
Gold vermeil (pronounced “ver-may”) represents a specific category of gold-dipped jewelry defined by three critical characteristics: a sterling silver base (92.5% pure silver), a gold layer of at least 2.5 microns thickness, and a minimum gold purity of 10 karats (though 14k and 18k are industry standards for premium pieces) . This distinguishes vermeil from standard gold plating, which may use base metals like brass or copper and significantly thinner gold layers.
1.2 Why Sterling Silver Base with Gold Dipping?
The combination of a sterling silver core with a gold exterior offers several compelling advantages:
| Property | Sterling Silver | Gold Vermeil | Solid Gold |
|---|---|---|---|
| Cost (relative) | 1x | 3-5x | 30-50x |
| Durability | Moderate | High (with thick plate) | Very High |
| Hypoallergenic | Yes (nickel-free) | Yes | Yes |
| Tarnish Resistance | Low | High | High |
| Workability | Excellent | Excellent | Excellent |
| Luxury Appearance | Moderate | Excellent | Excellent |
The sterling silver substrate provides excellent electrical conductivity essential for electroplating, superior malleability for intricate designs, and a naturally white base that enhances gold color brilliance . Unlike copper or brass bases, silver does not cause diffusion discoloration where underlying metals migrate through the gold layer over time.
1.3 Quality Benchmarks
Industry standards for high-quality gold-dipped silver jewelry establish clear performance metrics. Research on gold electroplating optimization identifies critical parameters: electroplating period, gold concentration, electric current density, and bath temperature significantly influence final thickness and uniformity . Optimal parameters for achieving 2.5-3.5 micron plating include a 17-minute plating duration, 0.4 g/L gold concentration, 0.6 A/dm² current density, and 60°C bath temperature. These parameters reduce thickness variation while maintaining specification compliance .
2. Materials and Equipment
2.1 Core Materials
Base Metal Components:
- Sterling silver (92.5% Ag, 7.5% Cu) sheet or casting grain—ASTM B413 standard
- Silver solder (hard, medium, and easy grades) for assembly
Plating Consumables:
- Gold plating solution (14k or 18k)—cyanide-based or cyanide-free formulations
- Gold plating salts for solution maintenance
- Degreasing solution (alkaline-based)
- Acid dip (5-10% sulfuric acid)
- Distilled water (critical for all rinse stages)
Surface Preparation:
- Polishing compounds (tripoli, rouge, green compound)
- Abrasive papers (400 to 2000 grit)
- Pickling solution (10% sulfuric acid or proprietary non-acid pickle)
2.2 Equipment Requirements
Metalworking Equipment:
- Jeweler’s saw and blades (2/0 to 4/0)
- Files (flat, half-round, round—cut #2 and #4)
- Soldering torch (oxygen/propane or air/acetylene)
- Soldering surface (charcoal or fire brick)
- Ring mandrel (steel, graduated sizes)
- Rawhide mallet
- Flexshaft or micromotor with assorted bits and burs
- Ultrasonic cleaner
Electroplating Setup:
- Electroplating power supply (rectifier) with 0-12V DC, 0-5A output
- Plating tank (glass or polypropylene, 1-2 liter capacity)
- Platinized titanium anode (dimensionally stable)
- Copper wire or titanium plating jig for work holding
- Immersion heater with thermostatic control (20-80°C range)
- Ventilation system or fume hood (essential for cyanide-based solutions)
- Filtration unit for solution maintenance
2.3 Safety Equipment
Gold electroplating, particularly with cyanide-based solutions, requires stringent safety protocols:
- Chemical-resistant gloves (nitrile, not latex)
- Safety goggles and face shield
- Acid-resistant apron
- Fume respirator (where ventilation is inadequate)
- Eyewash station
- Emergency shower access
3. Design and Master Creation
3.1 Design Philosophy for Inner Light Rings
The “Inner Light” aesthetic prioritizes luminous, reflective surfaces that interact dynamically with light. Contemporary designs feature double-band silhouettes measuring approximately 6.9mm in total band height, creating substantial presence while maintaining a delicate appearance . The design philosophy emphasizes:
- High-polish finish as the primary decorative element—no stone settings or texture that would diffuse reflected light
- Clean, uninterrupted surfaces that maximize light return
- Comfort-fit interiors (slightly domed inside surface) for extended wearability
- Subtle detailing visible only upon close inspection
3.2 Master Model Fabrication
The master model serves as the template from which all production pieces derive. For precision and repeatability, master models are typically fabricated in brass or fine silver, then used to create production molds.
Process sequence:
- Cut sterling silver sheet to approximate band width (allowing 10-15% for finishing)
- Form band around ring mandrel to target size, annealing as needed
- Solder seam using hard silver solder—joint must be invisible in final piece
- For double-band designs: fabricate two separate bands, solder together at precise 2mm spacing
- Shape exterior profile using graduated files, maintaining consistent 3.5mm band height
- Create comfort-fit interior using round bur or forming tool
- Progress through abrasive papers (400→800→1200→2000 grit)
- Final polish with rouge compound to mirror finish
The finished master must be flawless—every scratch, pit, or imperfection will transfer to every production piece.
3.3 Mold Making for Production
For quantities exceeding 20-30 pieces, mold-based production becomes economical. Two approaches dominate:
Silicone Rubber Molds (for wax injection):
- Vulcanized silicone molds capture extreme detail
- Wax injected under pressure produces identical replicas
- Ideal for lost-wax casting of complex forms
Metal Molds (for stamping):
- Hardened steel dies allow high-volume blank production
- Appropriate for simple band profiles without undercuts
- Higher initial cost but lowest per-unit cost
The mold-making decision depends on production volume and design complexity. For the described double-band design with comfort-fit interior, lost-wax casting from silicone molds typically yields superior results.
4. Silver Ring Fabrication
4.1 Casting Process
For production runs from a master model, lost-wax investment casting is the standard method:
- Wax injection: Inject molten wax into silicone mold under controlled pressure and temperature (typically 65-70°C wax temperature, 2-3 bar pressure)
- Tree assembly: Attach wax replicas to central wax sprue, creating a “tree” that allows multiple pieces per casting
- Investment: Encapsulate wax tree in gypsum-bonded investment material
- Burnout: Heat invested flask to 730-750°C, completely eliminating wax (approximately 8-12 hours)
- Casting: Centrifugal or vacuum casting draws molten 925 silver into cavity
- Quench and devest: Rapid water quench fractures investment; acid bath removes residual investment
4.2 Initial Finishing
Cast silver rings require substantial finishing before plating readiness:
Cutoff and coarse shaping:
- Remove sprue using jeweler’s saw at the piece-investment interface
- File cutoff stub flush with ring surface using #2 cut file
- Shape band profile to final dimensions, comparing to master model
Surface refinement sequence:
- Rough file (#2) to establish geometry and remove casting skin
- Medium file (#4) to refine shape and reduce scratch depth
- 400-grit abrasive: remove file marks completely
- 600-grit abrasive: prepare surface for medium polish
- 800-grit abrasive: refine to near-mirror condition
Pickling: After any heating or soldering, immerse rings in warm pickling solution (10% sulfuric acid or proprietary non-acid pickle) for 5-10 minutes to remove oxides and fire scale. Rinse thoroughly in distilled water.
4.3 Quality Inspection Before Plating
The pre-plating inspection is the most critical quality control point. Any defect present at this stage will be permanently encapsulated beneath the gold layer and become more visible, not less.
Inspection criteria:
- Surface must be completely free of pits, cracks, or porosity
- No scratches deeper than 600-grit equivalent visible under 10x loupe
- Seam lines (if soldered, not cast) must be invisible
- Interior comfort profile smoothly blended
- Dimensions within ±0.1mm of target
Handle only with clean gloves after final polishing—skin oils contaminate surfaces and prevent proper adhesion.
5. Gold Electroplating Process
5.1 Pre-Plating Surface Preparation
The success of electroplating depends entirely on surface cleanliness. Contaminated surfaces produce poor adhesion, cloudiness, or complete plating failure.
Ultrasonic degreasing:
- Prepare alkaline degreasing solution according to manufacturer specifications
- Heat to 20-30°C (room temperature to slightly warm)
- Immerse rings on plating jig or copper wire
- Ultrasonic agitation for 5-10 minutes
- Rinse with distilled water (three changes minimum)
Electrolytic degreasing (for optimal results):
- Transfer rings to electrolytic degreasing bath
- Apply 4-5 volts current for 30-45 seconds
- Rings should be cathode (negative) for cathodic cleaning
- Bubbles visibly detach contaminants from surface
- Rinse thoroughly with distilled water
Acid activation:
- Immerse in 5-10% sulfuric acid solution for 30-60 seconds
- This removes any oxide layer formed during previous steps
- No current required for this step
- Immediate, thorough rinse with distilled water
The cleaned rings must go directly to the plating bath—air exposure of even minutes can recontaminate surfaces.
5.2 Electroplating Parameters
Gold electroplating involves immersing the cleaned silver ring (cathode, negative terminal) and an inert anode (positive terminal) in a gold-containing electrolyte. When current flows, gold ions reduce onto the silver surface.
Optimized parameters (derived from experimental research):
| Parameter | Target Value | Acceptable Range |
|---|---|---|
| Plating duration | 17 minutes | 15-20 minutes |
| Gold concentration | 0.4 g/L | 0.35-0.45 g/L |
| Current density | 0.6 A/dm² | 0.5-0.7 A/dm² |
| Bath temperature | 60°C | 55-65°C |
| Voltage (typical) | 4-5 V | 3-6 V |
| pH (cyanide baths) | 10.5-11.5 | 10-12 |
These parameters produce a gold layer of approximately 2.5-3.5 microns thickness, depending on specific bath chemistry and part geometry .
Step-by-step plating procedure:
- Bath preparation:
- Add gold plating solution to distilled water (approximately 100ml concentrate per 900ml water)
- Dissolve gold plating salts completely
- Heat to 60°C using immersion heater with thermostatic control
- Jig and anode setup:
- Mount platinized titanium anode in plating tank
- Ensure anode fully submerged without contacting work piece
- Connect rings securely to cathode rod via copper wire or titanium jig
- Electrical connection must be positive and low-resistance
- Plating operation:
- Lower jig into plating bath
- Apply current gradually—do not exceed 0.6 A/dm²
- Gently agitate rings periodically during plating (every 2-3 minutes) to prevent gas bubble entrapment
- Maintain consistent bath temperature
- Rotate or reposition rings if jig design allows
- Duration calculation:
- For 2.5 micron thickness at 0.6 A/dm²: approximately 17 minutes
- Thicker deposits require proportionally longer times
- Verify periodically with XRF thickness measurement
5.3 Post-Plating Processing
Final rinse sequence:
- Remove plated rings from bath
- Immediate rinse in warm distilled water (40-50°C)
- Transfer to distilled water soak bath for 15-20 minutes
- Final rinse with fresh distilled water
- Dry with clean, lint-free cloth or warm air dryer
Inspection:
- Examine under 10x loupe for plating uniformity
- Check interior surfaces—often shadowed areas receive thinner deposits
- Verify color match to standard (14k vs. 18k appearance)
6. Quality Control and Testing
6.1 Thickness Verification
Gold layer thickness directly correlates with durability. Industry standard for “vermeil” requires minimum 2.5 microns, though premium manufacturers target 3.0-3.5 microns.
X-Ray Fluorescence (XRF) testing:
- Non-destructive surface analysis
- Measures gold thickness and karat accurately
- Test minimum three points per ring (top, left, right band surfaces)
- Document results for quality records
Limitations: XRF penetrates only a few microns, reading surface composition. For very thin platings (<0.5 micron), base metal influences results. For vermeil-thickness deposits, XRF provides reliable thickness data .
6.2 Adhesion Testing
Poor adhesion results in peeling or blistering during wear or subsequent sizing.
Simple field test:
- Bend test wire or thin section (destructive—use sample pieces)
- Apply and remove adhesive tape to plated surface
- Light abrasion with fine abrasive to check for lifting
Proper adhesion requires:
- Meticulous pre-cleaning (responsible for >90% of adhesion failures)
- Correct current density (too high causes “burned” deposits)
- No contamination between cleaning and plating
6.3 Visual and Functional Inspection
| Attribute | Acceptance Criterion | Rejection |
|---|---|---|
| Color uniformity | Consistent 14k/18k yellow hue | Pink, green, or streaked appearance |
| Surface defects | No pits, nodules, or roughness visible at 10x | Any visible defect |
| Coverage | Complete coverage, interior and exterior | Missed areas, especially interior |
| Brightness | Mirror finish | Hazy, cloudy, or dull surface |
| Fit | Comfortable, correct size | Binding, sharp edges |
7. Troubleshooting Common Issues
7.1 Poor Adhesion or Peeling
Symptoms: Gold layer separates from silver base, visible blistering or flaking.
Causes and solutions:
- Inadequate cleaning (most common): Re-evaluate degreasing protocol; verify solution freshness; increase ultrasonic duration.
- Surface oxidation: Ensure acid activation step immediately precedes plating; minimize air exposure between activation and plating.
- Silver contamination: Silver ions in gold bath cause codeposition and poor adhesion; filter bath or replace if contaminated.
7.2 Non-Uniform Thickness
Symptoms: Thicker deposits on exterior surfaces, thin or missing gold on interior or recessed areas.
Causes and solutions:
- Poor current distribution: Use auxiliary anodes near recessed areas; reposition work pieces.
- Gas bubble entrapment: Increase agitation frequency; adjust jig geometry to allow bubble escape.
- Thieves/shields needed: Add non-conductive shields to redirect current to thin areas.
7.3 Cloudy or Dull Finish
Symptoms: Milky appearance instead of bright, reflective gold.
Causes and solutions:
- Contaminated bath: Organic contamination from inadequate pre-cleaning; filter bath or treat with activated carbon.
- Incorrect temperature: Verify bath temperature at 60°C; low temperature causes dull deposits.
- Current density too high: Reduce to 0.5-0.6 A/dm²; high current produces rough, dark deposits.
8. Regulatory Compliance and Labeling
8.1 Legal Definitions
The term “vermeil” carries specific legal meaning in many jurisdictions, particularly the United States:
- Base metal must be sterling silver (minimum 92.5% silver)
- Gold must be minimum 10 karat (14k and 18k are standard for quality pieces)
- Gold layer must be minimum 2.5 microns (approximately 100 microinches) thick
Products not meeting these criteria cannot legally be marketed as “vermeil” and must be labeled “gold plated” or “gold flashed.”
8.2 Marking Requirements
Quality gold-dipped silver jewelry should bear three stamps:
- Base metal fineness: “925″ for sterling silver
- Plating karat and type: “18k GP” (gold plated) or “18k G.E.” (gold electroplated)
- Manufacturer’s trademark or registered mark
Vermeil pieces may be marked “18k Vermeil” or “18k Gold Vermeil over Sterling.”
8.3 Documentation for Customers
Provide traceability documentation including:
- Metal fineness certificates for base silver
- Plating thickness test results (XRF data)
- Care and maintenance instructions
- Warranty terms covering plating durability (typically 1-2 years for vermeil)
9. Care and Maintenance Guidelines
9.1 Durability Expectations
Gold-dipped silver is durable but not indestructible. With proper care, quality vermeil maintains appearance for 2-5 years of regular wear. Factors reducing longevity include:
- Daily wear without rotation
- Exposure to chlorine (swimming pools, hot tubs)
- Contact with household chemicals (bleach, ammonia)
- Abrasion from hand creams or sunscreens
9.2 Customer Care Instructions
Provide written care guidelines with each piece:
DO:
- Remove rings before swimming, bathing, or applying lotions
- Clean gently with soft cloth after wearing
- Store individually in soft pouch or lined box
- Have replated when gold shows wear (replating is possible)
DO NOT:
- Use abrasive or chemical jewelry cleaners
- Wear while sleeping (causes accelerated abrasion)
- Expose to chlorine, bleach, or sulfur compounds
- Attempt to size or repair without replating afterward
9.3 Replating Services
Gold-dipped silver can be replated multiple times throughout its life. The replating process follows the same protocol as initial plating but requires stripping of remaining gold (typically in cyanide-based stripping solution) before refinishing the silver and replating.
10. Conclusion
Manufacturing high-quality gold-dipped silver “Inner Light” rings requires mastery of two distinct crafts: traditional silversmithing and precision electroplating. The process demands attention to detail at every stage, from the flawless finish of the silver substrate to the meticulous cleaning that precedes plating, and finally to the precise control of electrochemical parameters that determine gold layer quality and thickness.
The key factors distinguishing premium vermeil from ordinary plated jewelry are thickness (minimum 2.5 microns), substrate quality (sterling silver, not base metal), and surface preparation (scrupulous cleanliness at every step). When these factors align, the resulting piece captures the intended “Inner Light” quality—a luminous, radiant surface that reflects light beautifully while providing durability for everyday wear.
For manufacturers entering this market, investment in proper electroplating equipment and training pays dividends through reduced rejection rates and extended product lifetimes. The market for consciously produced, high-quality plated jewelry continues to grow as consumers seek the luxury appearance of gold at accessible price points, making this an opportune time to develop expertise in vermeil manufacturing.